How to set up your fibre router
Follow these easy steps to connect your router.
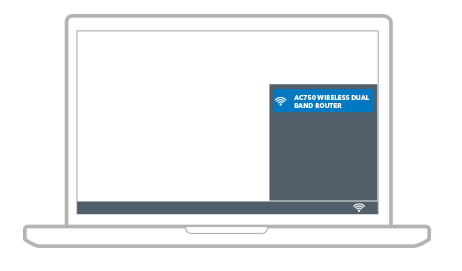
These steps are for the TP Link AC750 Dual Band router.
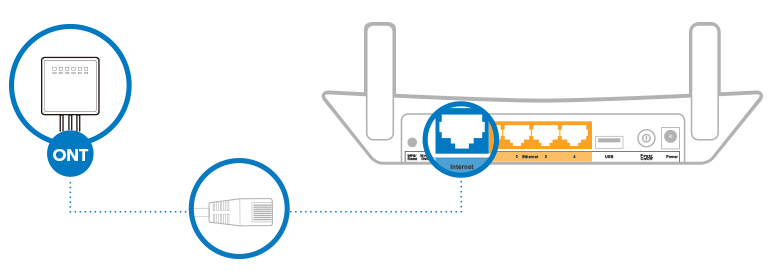
Step 1: Connect your Fibre
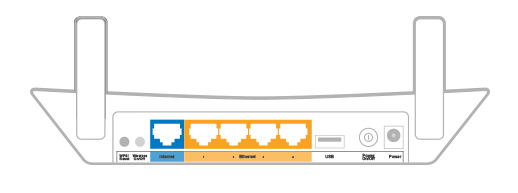
On the back of your router, you will see five ports, one blue (WAN port) and 4 oranges (LAN ports).
First things first. Plug your router in and make sure it is switched on. Then connect it to your ONT with an Ethernet cable via the blue port on the back of the router, this will connect your router to the internet.
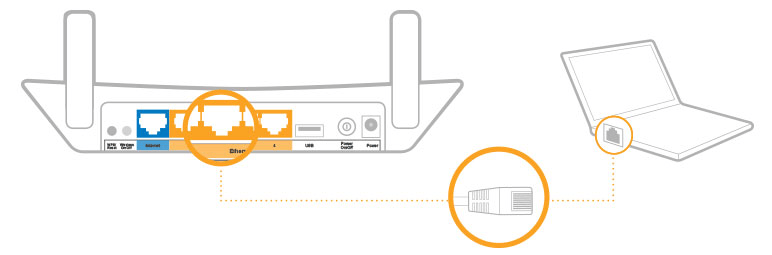
Step 2: Connect your device to the router via cable or Wi-Fi
-
Via Cable
Simply connect your PC to any of the orange ports on the router with a LAN cable.
-
Via Wi-Fi
If you’d prefer to use Wi-Fi, you need to check under your router for the Wi-Fi network name, which may be called an SSID and the Password or security key. These are the default login details for the network.
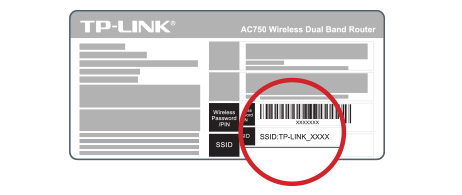
On your device, find the network that matches the SSID on the bottom of your router and connect to it using the password.
Step 3: Personalise your WiFi settings
Now that you’ve connected your device to your router you’ll want to change the network name and password to make connecting devices easier.
-
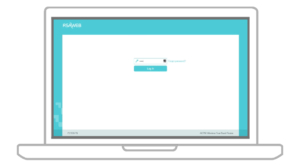
Log into your router
Open your internet browser and type “tplinkwifi.net” or “192.168.0.1” in the address bar and press enter. This will take you to a TP-Link page. Log into the TP-Link page by entering the username and password: admin
-
Change your WiFi network name
Click on the left menu option labeled Wireless, then click on Basic Settings.
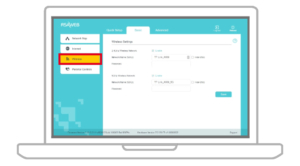
Rename your WiFi network to whatever you’d like by editing Wireless Network Name. Once you have renamed your network, click Save.

-
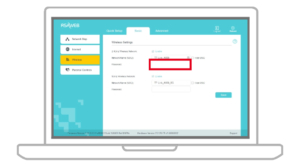
Change your WiFi password
Remove the current text within the Wireless password field and enter your new password. Click Save to finish your setup.
Let us know — it helps us improve our articles.
Our support team is ready — we'll sort it out for you.
Powered by WHMCompleteSolution
